Little Dipper Telescope
July 2005: Little Dipper wins 3rd Place in the Cloudy Nights ATM contest...
Read the article here...
|
|||
|
First sawdust - 10 April 2005 - cutting the upper ring, a very pleasant, zen like experience.
|
|||
 | April 10 - Cut the top ring and made some lugs to hold the spider from 1/8" aluminum angle. The ring is 11.5" inside diameter and 15.5 outside. Surprisingly stiff for such a light component. Makes a decent frisbee too. Low tech circle cutting with a router: screw the router base to a board, drill a hole in the board, use the drill bit as a pivot. Repeat until you get the correct radius. | ||
 | Cut the parts for the mirror box and glued up the formica tube. You could make a precise jig to hold the tube in the proper curve - I just bent it to approximate the curve while the epoxy dried - I balanced a brick on top. | ||
   |
Using more aluminum angle and some 3/32 sheet I found in a box in the garage, made a focuser shelf.
3 Holes are to mount the helical crayford focuser.
The 3 extra holes are to mount a baffle like Mel Bartels has done to keep stray light out
of the 2" focuser tube. 99% of the time I expect to be using 1.25" eyepieces. Not too shabby for just a jig saw, a file and a drill press :) Those screws will be replaced with black stainless steel hex head screws, and the shelf will be anodized black. Tip: if you're not a machinist with all those great vices on your drill press (I'm not) and you want to make perfectly mating holes in 2 pieces of aluminum so you can tap screw threads in one piece, this worked well for me: use a gooey type of super glue (I used Zap-A-Gap) and stick the 2 pieces together, then drill both at once using the tap drill. It's pretty easy to pry the pieces apart again by sort of hammering a razor blade between them (well, it was for me. Not my fault if they stick forever, but if they do, who needs the screws anyhow?). | ||
|
May 2005 - All my parts have arrived except the spider.
|
|||
 | I made a lot of progress on May 1. Mayday. International Workers Day. | ||
  | Before and after glue up and finishing the mirror box. I sprayed finish (exterior water-based semi gloss) on the inner parts first since it wouldn't have been possible after glue-up. Then put masking paper on the formica tube (only the part that would be exposed) and glued top, bottom and sides together (gorilla glue, biscuit splines). Once the glue dried, I could tidy up the joints with a belt sander, finish sand and spray the rest of the finish on. The little legs came in handy - I could spray the bottom and then flip it over on to the legs and do the top. | ||
 | In between waiting for finish coats to dry I made a bracket to attach my finder dovetail to a tube. It's just 3 bits of 1/2" ply glued together and then 'carved' with a chop saw (watch your pinkies!). Sprayed flat black since it will be very close to the light path. Total cost - 53 cents for the threaded insert and 18 cents for the SS cap screw. Such a deal. | ||
  |
This is the bar stock for my mirror cell - $6.68 from onlinemetals.com - I got my truss tubes there also. Nice folks.
The cell is identical to Albert's in concept - but instead of a casting I'm using flat bar stock lap jointed at the corners to make the center triangle. This way I can machine it easily using a drill press.
| ||
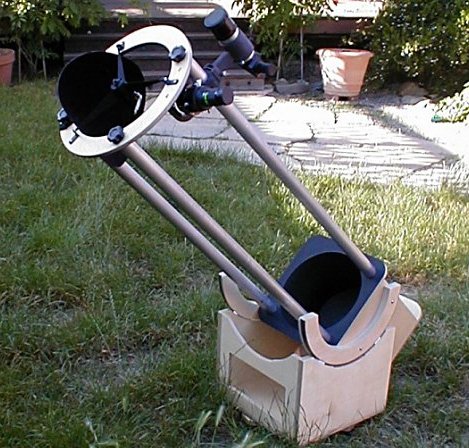
 | Starting to look like a - well a something. These parts of the OTA weigh only 9 pounds. It will be a little bit shorter than this - the tubes are not yet cut to length. It should wind up about 54" long. What you see here is 62". | ||
  | May 5 - aluminum parts for UTA back from bead blasting and anodizing - bead blasting makes a great flat finish! I was going to paint these parts originally but a very generous fellow observer offered to do the bead blasting and let me piggyback on some anodizing he was doing. What a difference! I couldn't get paint to stick to aluminum anyhow. | ||
  | May 7-8 - Machined the parts for the cell and test fit. The cell weighs 19 ounces. | ||
  |
May 14-15 - Good weekend. Things come together quickly when most of the parts are finished.
I put together the OTA parts to test that the aluminum tube length was
correct (It wasn't, but luckily too long and not too short). I got a couple of
stars in focus and got the measurement for the right length.
Doesn't count as first light by a long shot but way fun!
Also weighed the OTA with finders, dummy counterweight and all the trappings. It's 26.5 pounds. Looks like the whole scope might come in under 40. Made a lid with a fan in it, enough to keep the cats out anyhow, still need some ideas for a fan hole cover and a way to keep it attached to the mirror box, something invisible like magnets or voodoo. Also started the rocker box. | ||
  
| May 21-22 - Rocker box parts all cut and assembled. Started brushing finish on. I made a mistake while routing the rocker box bearing races (the curves). I was able to turn it into a decorative detail which I liked enough to repeat on the front of the box. The sides of the box look heavy because they are thick, but they're hollow. They're made of light 1/2" thick frames with 1/8" skins glued on, sometimes called a torsion box. | ||
  |
May 26 - First light! I'm not sure really what I am supposed to see, but it all looked good!
Up until now I have really only spent time with refractors.
Saw a little white spot transit on jupiter at about 10:45, went and looked at Porrima, couldn't split it (ha ha!).
I know I'll be chasing that puppy all summer. Split Delta Serpentis, 3.9", yawn.
My logs for this double in the 4" refractor say 'very tight pair' - not tonight,
you could fit another star in the space between them. Pretty sure I have a lot to learn about collimation, and I think I need beefier springs on the mirror cell. Motions are very smooth. I built the scope with a 12 oz. counterweight planned, but haven't made the weight yet, so it's a little bottom heavy, but it managed OK which is great - if it handles OK when it is 12 oz. out of balance then it should be nice with the weight on there. It's really nice comfort-wise. With an adjustable chair I can sit comfortably with the scope pointed just about anywhere. I'm used to judging seeing with a much smaller aperture - with a 10" I can't see proper diffraction rings at 200x or even 290x but it seemed fair to good tonight. Star test is slightly non-concentric when racked out, but not when racked in - I expect this is due to the helical focuser. Plenty of time to test and tweak coming up! | ||
  |
June 9 - I've added a sliding counterweight, got better mirror cell springs and added a
cooling fan to the back with polyester covered elastic. The fan can run while
observing, I haven't noticed any trouble with vibration yet, and it seems to
help a little with clearing out any tube currents and some boundary layer effects
while the mirror is cooling.
The scope had been outside for about 45 minutes cooling with the fan on when I got a good look at a double transit on Jupiter.
| ||
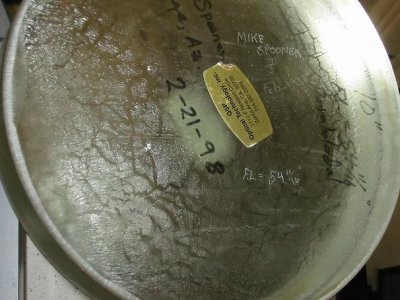
"A nearly perfect 10" optic is an awesome machine..."
-- Michael Spooner